ராஸ்டர் செயலாக்க கருவிகள்
இந்த உதாரணம் ராஸ்டர் பணிப்பாய்வுகளை தானியக்கமாக்குவதற்காக KDRM உருவாக்கிய சில ராஸ்டர் மற்றும் பட செயலாக்க கருவிகளைக் காட்டுகிறது. ஆர்வமுள்ள பகுதிக்கு பேட்ச் கிளிப்பிங் ராஸ்டர்கள், தேவையான வெளியீட்டுத் தீர்மானத்திற்கு ராஸ்டர்களை மறு மாதிரி செய்தல், பின்னர் பகுப்பாய்வுக்காக ராஸ்டர் உள்ளீடுகளைத் தயாரித்தல் மற்றும் பெரிய டெலிவரி பணிப்பாய்வுகளில் இருந்து மெதுவாக மீண்டும் மீண்டும் வரும் கைமுறை செயலாக்கப் படிகளை அகற்றுதல் போன்ற பணிகளுக்கு இந்தக் கருவிகள் பயனுள்ளதாக இருக்கும்.
கீழே உள்ள எடுத்துக்காட்டுகள் திறந்த மூல பைதான் தொகுப்புகளில் மட்டுமே கவனம் செலுத்துகின்றன. நடைமுறையில், கிளையன்ட் சூழல் மற்றும் பணிப்பாய்வு எவ்வாறு இயக்கப்பட வேண்டும் என்பதைப் பொறுத்து, இது போன்ற கருவிகளை தனித்த ஸ்கிரிப்டுகள், திட்டமிடப்பட்ட செயலாக்க வேலைகள் அல்லது ArcGIS Pro அல்லது QGIS இல் பரந்த டெஸ்க்டாப் பணிப்பாய்வுகளுக்குள் உட்பொதிக்கலாம்.
இந்த கருவிகள் எதற்காகப் பயன்படுத்தப்படுகின்றன
- டிஇஎம்கள், டிடிஎம்கள் மற்றும் பிற ராஸ்டர்களை ஆர்வமுள்ள பகுதிக்கு க்ளிப்பிங் செய்யவும்.
- பின்னர் கணக்கீடுகள் மற்றும் மாடலிங் செய்ய செல் அளவுகளை சீரமைக்க ராஸ்டர்களை மறு மாதிரியாக்குதல்.
- கீழ்நிலை பகுப்பாய்விற்கு முன் ராஸ்டர் உள்ளீடுகளை வடிகட்டுதல் மற்றும் சரிபார்த்தல்.
- ராஸ்டர் செயலாக்க படிகளை தானியங்குபடுத்துதல், இல்லையெனில் பல மணிநேரம் கைமுறையாக வேலை செய்ய வேண்டியிருக்கும்.
- டெஸ்க்டாப், சர்வர் அல்லது கட்டளை வரி சூழல்களில் இயக்கக்கூடிய மீண்டும் மீண்டும் செய்யக்கூடிய ராஸ்டர்-செயலாக்க பைப்லைன்களை உருவாக்குதல்.
ஏன் இது போன்ற கருவிகளை உருவாக்குகிறோம்
செயல்திறன், ரிபீட்டிபிலிட்டி மற்றும் பெயர்வுத்திறன் ஆகியவை முக்கியமானவை என்பதால், ராஸ்டர்-ஹெவி திட்டங்களுக்கான தனிப்பயன் ஆட்டோமேஷனை நாங்கள் தொடர்ந்து உருவாக்குகிறோம். சில சமயங்களில் ஆர்க்ஜிஐஎஸ் சார்பு இல்லாமல் தூய ஓப்பன் சோர்ஸ் ஒர்க்ஃப்ளோவாக இயங்க வேண்டும். மற்ற சந்தர்ப்பங்களில், அதே தர்க்கம் ArcGIS Pro அல்லது QGIS பணிப்பாய்வுக்குள் இருக்க வேண்டும், எனவே ஆய்வாளர்கள் பழக்கமான டெஸ்க்டாப் சூழலில் செயல்முறையை இயக்க முடியும். அடிப்படை அணுகுமுறை ஒன்றுதான்: மீண்டும் மீண்டும் வரும் பகுதிகளை தானியங்குபடுத்துதல், தர்க்கத்தை வெளிப்படைத்தன்மையுடன் வைத்திருத்தல் மற்றும் பணிப்பாய்வுகளை மீண்டும் இயக்கவும் ஆதரிக்கவும் எளிதாக்குகிறது.
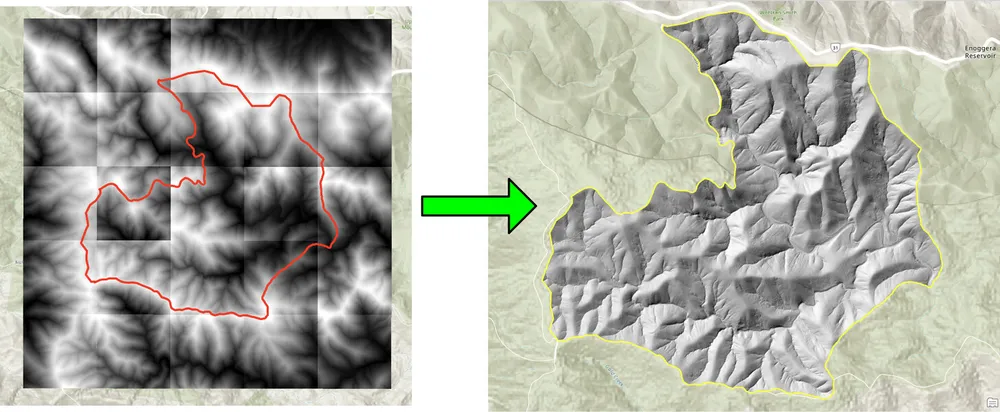
பாரம்பரிய டெஸ்க்டாப் அணுகுமுறையுடன் கூடிய தொகுதி கிளிப்பிங் ராஸ்டர்கள் மிகவும் மெதுவாக இருக்கும் பணிப்பாய்வுக்காக கீழே உள்ள கிளிப்பிங் உதாரணம் உருவாக்கப்பட்டது. ஓப்பன் சோர்ஸ் பைதான் தொகுப்புகள் மூலம் செயல்முறையை மீண்டும் எழுதுவது பணிப்பாய்வுகளை வியத்தகு முறையில் வேகமாகவும், பெரிய ராஸ்டர் சேகரிப்புகளுக்கு மிகவும் நடைமுறையாகவும் மாற்றியது. மறு மாதிரி உதாரணம் இதே போன்ற காரணத்திற்காக கட்டப்பட்டது, அங்கு பெரிய ராஸ்டர் தரவுத்தொகுப்புகள் ஒரு சிறந்த வெளியீட்டு செல் அளவிற்கு சீரமைக்கப்பட வேண்டும், எனவே பின்னர் ராஸ்டர் கணக்கீடுகள் தேவையான தெளிவுத்திறனில் இயங்க முடியும்.
எடுத்துக்காட்டு 1. ஓப்பன் சோர்ஸ் பைத்தானுடன் பேட்ச் கிளிப்பிங் ராஸ்டர்கள்
import json
import numpy as np
import os
import rasterio
import shutil

from rasterio.mask import mask
from shapely.geometry import shape
# the input and output directories for the rasters
input_directory = "input"
output_directory = "output"

# delete and recreate the output directory
if(os.path.exists(output_directory)):
    shutil.rmtree(output_directory)

os.makedirs(output_directory)

feature_collection = dict()

with open('national_park.geojson', 'r') as f:
    feature_collection = json.load(f)
area_of_interest = feature_collection['features'][0]['geometry']
clip_area = shape(area_of_interest)

for file in os.listdir(input_directory):
    # filter by tif files and only files with 2019 in the name
    if file.endswith('.tif') and '2019' in file:
        print(file)

        input_raster = os.path.join(input_directory, file)
        output_raster=os.path.join(output_directory, file)
        with rasterio.open(input_raster) as src:
            try:
                out_image, out_transform = mask(src, [clip_area], crop=True)

                # Set all nodata values to -99999
                out_image[out_image == src.nodata] = -99999
                raster_intersected = not np.all(out_image == -99999)
                # Check if the clip area intersects the raster and only save the raster if the clip area intersects with it
                if raster_intersected:
                    out_meta = src.meta.copy()
                    out_meta.update(
                        {
                            "driver": "GTiff",
                            "height": out_image.shape[1],
                            "width": out_image.shape[2],
                            "transform": out_transform,
                        }
                    )
                    with rasterio.open(output_raster, "w", **out_meta) as dest:
                        dest.write(out_image)

            except Exception as err:
                if ('Input shapes do not overlap raster' not in str(err)):
                    print('### Error with {} ###'.format(input_raster))
                    print(err)
                pass
எடுத்துக்காட்டு 2. ஓப்பன் சோர்ஸ் பைதான் மூலம் ராஸ்டர்களை மீண்டும் மாதிரியாக்குதல்
import os
from osgeo import gdal

import numpy as np
import os

# the input and output directories
input_directory = 'input/DTM'
output_directory = 'output/DTM'

if not os.path.exists(output_directory):
    os.makedirs(output_directory)
for root, dirs, files in os.walk(input_directory):
    for file in files:
        if(file.endswith('.tif')):
            input_file = os.path.join(root, file)
            output_file = os.path.join(output_directory, file)

            print(file)

            # Read the input raster file
            raster = gdal.Open(input_file)
            # Get the original cell size
            cell_size = raster.GetGeoTransform()[1]
            # print('Original cell size: {}'.format(cell_size))

            # Calculate the number of cells for the output
            num_cells = int(np.ceil(cell_size / 0.5))
            # Create the output raster file
            driver = gdal.GetDriverByName('GTiff')
            out_raster = driver.Create(output_file, raster.RasterXSize * num_cells,
                                    raster.RasterYSize * num_cells, 1,
                                    gdal.GDT_Float32)

            # Set the output raster's projection
            out_raster.SetProjection(raster.GetProjection())
            # Set the output raster's geotransform
            out_raster_geo = list(raster.GetGeoTransform())
            out_raster_geo[1] = 0.5
            out_raster_geo[5] = -0.5
            out_raster.SetGeoTransform(out_raster_geo)

            nodata = -99999

            for i in range(1, out_raster.RasterCount + 1):
                # set the nodata value of the band
                out_raster.GetRasterBand(i).SetNoDataValue(nodata)
            # Copy the input raster data to the output raster
            gdal.ReprojectImage(raster, out_raster,
                                raster.GetProjection(),
                                out_raster.GetProjection(),
                                gdal.GRA_NearestNeighbour)

            # Close the files
            out_raster = None
            raster = None
டெலிவரி விருப்பங்கள்
மேலே உள்ள எடுத்துக்காட்டுகள் வேண்டுமென்றே எளிமையானவை, ஆனால் அதே அணுகுமுறையை பதிவு செய்தல், சரிபார்த்தல், இணை செயலாக்கம், மெட்டாடேட்டா சோதனைகள், பேக்கேஜிங் மற்றும் பரந்த ஜிஐஎஸ் டெலிவரி பைப்லைன்களில் ஒருங்கிணைத்தல் ஆகியவற்றுடன் பெரிய உற்பத்தி பணிப்பாய்வுகளுக்கு நீட்டிக்கப்படலாம். கிளையண்ட் தேவையைப் பொறுத்து, இந்தக் கருவிகளை தனித்த ஸ்கிரிப்ட்களாக, ArcGIS Pro அல்லது QGISக்கான டெஸ்க்டாப்-ஒருங்கிணைந்த கருவிகளாக அல்லது பரந்த இடஞ்சார்ந்த தரவு தளத்தின் ஒரு பகுதியாக உற்பத்தி செய்யப்பட்ட சேவைகளாக வழங்க முடியும்.